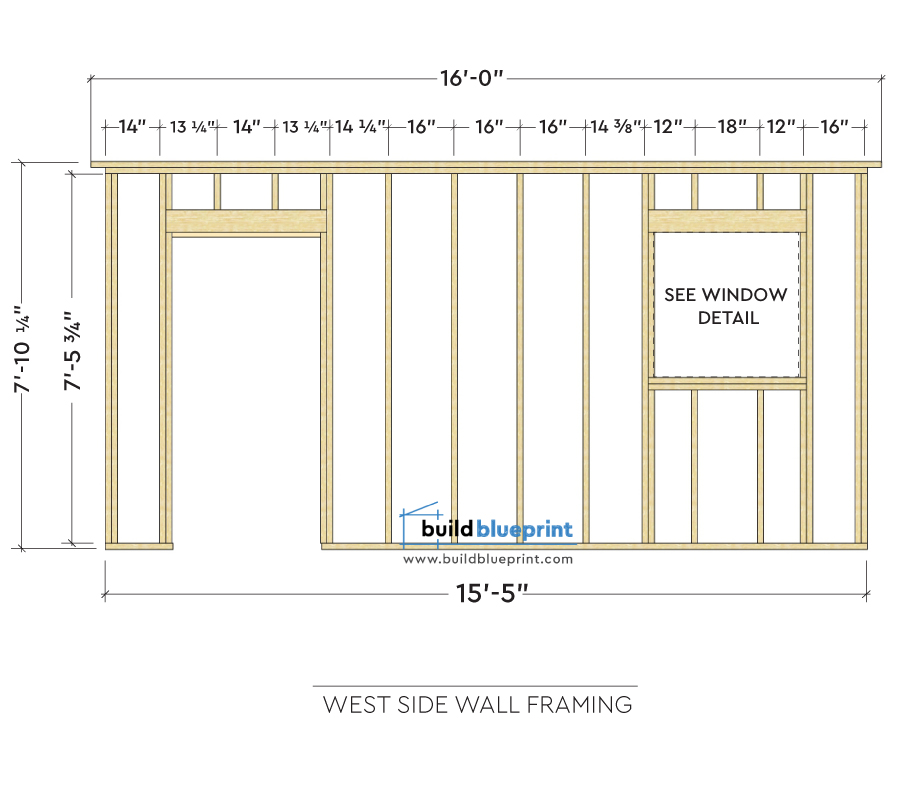
Wall framing is the stage where a shed build starts to look like a building instead of a floor deck. It’s also the stage where most first-time builders slow down — not because the work is technically difficult, but because the terminology and sequence aren’t always obvious from a plan set alone. Once you understand the logic behind stud spacing, plates, and headers, framing a wall is genuinely straightforward.
This guide walks through the complete process of framing a standard shed wall: laying out plates, cutting and spacing studs, building headers for doors and windows, assembling the frame flat on the floor, and raising it into position. By the end, you’ll understand not just what to do at each step, but why it’s done that way — which makes the rest of your build go faster.
Before you start framing walls, your floor frame should be complete, level, and square. If you haven’t finished that stage yet, see our foundation guides for gravel pad foundations or concrete block foundations.
What You’ll Need
Materials
- 2×4 lumber: For standard sheds. Use 2×6 if you’re planning to insulate, or if your plan specifies it for larger structures or higher snow loads.
- 16d common nails or 3″ construction screws: For plate-to-stud connections.
- 10d nails or 3″ screws: For toe-nailing studs and general framing connections.
- Construction adhesive (optional): Adds extra holding strength at plate and header connections.
- Temporary bracing lumber: Scrap 2×4s for bracing walls upright until sheathing goes on.
Tools
- Circular saw
- Framing square and a speed square
- 4-foot level and a longer level or straightedge
- Tape measure
- Framing hammer or a nail gun with a compressor
- Chalk line
- Stud finder marking pencil (a regular carpenter’s pencil works fine)
Understanding the Parts of a Wall Frame
Before cutting anything, it helps to know the vocabulary. A standard wood-frame wall is built from a small number of repeating parts:
- Bottom plate (sole plate): The horizontal board that sits at the base of the wall, attached to the floor frame.
- Top plate: The horizontal board that caps the top of the wall. Many shed plans call for a double top plate — two boards stacked — for extra strength and easier roof framing connections.
- Studs: The vertical boards that run between the bottom and top plates, spaced at regular intervals.
- King stud: A full-height stud positioned on either side of a door or window opening.
- Jack stud (trimmer stud): A shorter stud that supports the header, running from the bottom plate up to the underside of the header, positioned right next to the king stud.
- Header: A horizontal beam spanning the top of a door or window opening, carrying the structural load that would otherwise pass through the studs that were removed to create the opening.
- Cripple stud: A shorter stud above a header (running up to the top plate) or below a window sill, filling the gap where a full-length stud doesn’t fit.
- Sill plate (rough sill): The horizontal board forming the bottom of a window’s rough opening.
Every wall on a standard shed is some combination of these parts. Once you recognize them, reading a framing plan becomes much easier.
Step 1: Lay Out Your Plates
Framing starts by cutting your top and bottom plates to the exact length of the wall section you’re building, then marking stud positions on both plates simultaneously so they line up perfectly.
- Cut two boards for the bottom plate and two (or one, per your plan) for the top plate, all to the same length — the full length of the wall you’re framing.
- Lay the plates side by side, edges touching, so you can mark stud layout lines across both at once. This guarantees your top and bottom plate stud marks align exactly, which is critical for the wall to go together square.
- Mark stud positions at 16 inches on center, starting from one end. “On center” means the measurement is taken from the center of one stud to the center of the next — in practice, most builders mark the edge of where each stud will sit and use an X to indicate which side of the line the stud goes on, to avoid confusion during assembly.
- Mark the first stud position at 15¼ inches from the end of the plate (accounting for the ¾-inch thickness of the first end stud), then continue marking every 16 inches after that. Standard 16″ on-center spacing aligns with 4×8 sheathing panels, so your siding and interior sheathing land on stud centers without extra cutting.
- Mark king stud and jack stud positions at every door and window location according to your plan’s dimensions, measuring from the same reference end you used for the regular stud layout.
Step 2: Cut Studs to Length
Stud length is determined by your wall height minus the combined thickness of your top and bottom plates. For a standard 8-foot wall with a single bottom plate (1.5″) and a double top plate (3″), studs are cut to 92¼ inches — this is the widely used standard stud length for 8-foot wall construction, and pre-cut “pre-cut studs” sold at most lumber yards are milled to this exact length for convenience.
If your plan specifies a different wall height, calculate stud length as: wall height − (bottom plate thickness + top plate thickness). Double-check this number against your specific plan before cutting a full stack of studs — a small error here gets repeated across every stud in the wall.
Cut all common studs first, then move on to king studs, jack studs, and cripple studs, which are typically shorter and require more careful calculation based on the specific header height and rough opening dimensions in your plan.
Step 3: Build Headers for Doors and Windows
A header carries the structural load above any opening in the wall — without it, the weight from the roof and any wall above the opening would have nothing to bear on where studs were removed to make room for a door or window.
For most shed-scale openings, a standard built-up header consists of two pieces of dimensional lumber (commonly 2×6 or 2×8, sized according to your plan and the width of the opening) with a piece of ½-inch plywood sandwiched between them, matching the header’s total thickness to the wall’s 3.5-inch stud depth. This built-up construction is both strong and simple to build with standard lumber.
- Cut two pieces of header lumber to the width of the rough opening plus the combined width of both jack studs (typically opening width + 3 inches for two 1.5″-thick jack studs).
- Cut a matching piece of ½-inch plywood to the same length as the header lumber, sized to fit between the two boards.
- Sandwich the plywood between the two header boards and nail or screw the assembly together from both faces, working along the full length at regular intervals.
- Set the completed header aside, labeled with which opening it belongs to if you’re building headers for multiple openings at once.
Header size requirements scale with opening width — a wider door or window needs a deeper header to carry the same load across a longer span. Always follow your specific plan’s header specifications rather than assuming one size fits every opening on the shed.
Step 4: Assemble the Wall Flat on the Floor Deck
The most efficient and accurate way to frame a wall is to build it flat on the floor deck, then raise it into position as a complete unit. This is dramatically easier than trying to frame a wall stick-by-stick while it’s already standing vertically.
- Lay the bottom plate and top plate on the floor deck, parallel to each other and separated by the length of your studs, with the marked stud-layout faces oriented toward each other.
- Set each common stud in position between the plates, aligned with its layout marks on both the top and bottom plate.
- Nail through the plates into the ends of each stud — typically two 16d nails or three construction screws per connection, driven through the plate face into the end grain of the stud. Working on a flat floor deck makes this connection far easier and more accurate than nailing through a plate on a standing wall.
- Assemble door and window openings by setting king studs at the marked positions, then jack studs immediately next to them, then setting the header on top of the jack studs at the correct height, and finally adding cripple studs above the header (and below any window sill) to fill the remaining space up to the top plate.
- Check the entire wall assembly for square before standing it up, by measuring both diagonal corners of the completed frame — equal diagonal measurements confirm a square wall.
Step 5: Raise the Wall
Raising a wall is straightforward but goes much better with a second person, particularly for anything longer than about 8 feet. A single person can raise a shorter wall section alone with careful technique, but a helper reduces both the physical difficulty and the risk of the wall shifting or falling during the lift.
- Position the assembled wall along its final location on the floor deck, with the bottom plate aligned exactly where it will be permanently fastened.
- Lift the wall from the top plate side, walking it upright while the bottom plate acts as a pivot point along the floor edge.
- Once vertical, check the wall for plumb using a 4-foot level held against a stud face, and adjust as needed before securing anything permanently.
- Temporarily brace the wall with diagonal scrap lumber, one end nailed to a stud near the top of the wall and the other end staked or nailed to the floor deck, angled to resist the wall tipping in either direction. Install bracing on at least two sides for any wall that will stand alone for more than a few minutes.
- Nail or screw the bottom plate to the floor frame through the subfloor into the rim joist or floor joists beneath, following your plan’s fastening schedule.
Raise and brace one wall at a time if you’re working alone, or raise adjacent walls in sequence with a helper, connecting corner studs together with nails or screws as each new wall goes up next to the previous one. This progressively stabilizes the structure — by the time you’ve raised all four walls, the corner connections themselves provide significant additional rigidity even before any sheathing goes on.
Step 6: Connect and Square the Full Wall Structure
Once all walls are raised and braced, do a final check of the entire structure before moving on to roof framing.
Check every wall for plumb — vertical in both directions, not leaning in or out — using a 4-foot level. Adjust temporary bracing as needed to correct any lean before permanent fastening.
Check the overall floor plan for square by measuring the diagonals of the full building footprint, corner to corner. If the two diagonal measurements match, the structure is square. This is your last practical opportunity to correct any accumulated error before roof framing locks everything into its final position.
Nail or screw all corner stud connections where adjacent walls meet, following your plan’s fastening schedule. This is what transforms four individual wall panels into one connected, structurally rigid box.
Leave temporary bracing in place until wall sheathing is installed. Sheathing (typically the same T1-11 panels used as siding, or plywood/OSB if you’re applying separate siding later) is what provides the wall’s final permanent racking resistance — the temporary diagonal braces are only there to hold everything plumb and square until that happens.
2×4 vs. 2×6 Wall Framing
Most standard storage sheds are framed with 2×4 lumber at 16 inches on center, which provides more than adequate structural strength for a typical single-story shed with a standard roof load. There are specific situations where stepping up to 2×6 framing is worth the additional material cost — use our shed cost calculator to see how much the upgrade adds to your specific build:
- If you plan to insulate the shed — 2×6 walls provide roughly 5.5 inches of cavity depth for insulation versus 3.5 inches with 2×4 framing, which matters if you’re building a workshop or she shed you plan to use in cold weather.
- If your region has high snow load requirements — check your local building code’s snow load rating; some northern regions and mountain areas specify heavier framing for accessory structures regardless of size.
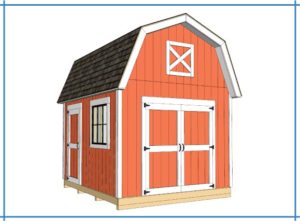
- If your plan specifically calls for it — larger sheds (typically 14×20 and above) sometimes specify 2×6 construction for additional structural capacity, particularly if a loft or heavier roof style like a gambrel is part of the design.
For a standard 8×10, 10×12, or 12×16 storage shed without insulation plans, 2×4 framing at 16″ on center is the industry standard and what all of our shed plans are designed around by default.
Common Mistakes to Avoid
Marking stud layout on only one plate. Marking both the top and bottom plate simultaneously while they’re laid side by side guarantees stud positions align on both ends. Marking them separately, even carefully, introduces small measurement errors that compound into a stud that isn’t quite vertical.
Building headers undersized for the opening width. A header that’s too shallow for the span it’s covering can sag over time under roof load. Always follow your plan’s header size specification for each specific opening width rather than using a single header size for every door and window on the shed.
Skipping the plywood spacer in built-up headers. The ½-inch plywood spacer between header boards isn’t just a spacer — it brings the header’s total thickness to match the wall’s 3.5-inch stud depth, so the header sits flush with the framing on both faces. Omitting it leaves a gap that complicates siding and interior finish work later.
Raising walls without adequate bracing. A freshly raised wall with no diagonal bracing can tip over in a gust of wind or from an accidental bump before sheathing is installed. Always brace immediately after raising, on at least two sides, before moving on to the next wall.
Not checking for square before sheathing. Once sheathing goes on, the wall’s shape is locked in. Check every wall for plumb and the overall structure for square before you start attaching sheathing — correcting an out-of-square structure after sheathing is installed means removing fasteners and starting over.
Using the wrong nail or screw length. Fasteners that are too short don’t achieve adequate holding power at plate and header connections; fasteners that are too long can blow through the opposite face of thinner members. Follow your plan’s specified fastener sizes for each connection type rather than using whatever is on hand.
Frequently Asked Questions
What size lumber should I use to frame a shed wall?
Standard 2×4 lumber at 16 inches on center is the typical choice for a standard storage shed without insulation plans. Step up to 2×6 framing if you plan to insulate the shed, if your region has high snow load requirements, or if your specific plan calls for it — typically on larger structures (14×20 and up) or those with a gambrel roof and loft.
How far apart should shed wall studs be?
16 inches on center is the standard stud spacing for shed wall framing, matching standard 4×8 sheathing panel dimensions so siding and sheathing land on stud centers without extra cutting. Some plans for smaller, lighter sheds may specify 24 inches on center to save material, but 16″ on center is the more common and more structurally conservative choice.
Do I need a header over every door and window?
Yes. Any opening in a load-bearing wall — which includes every wall on a standard shed — needs a header to carry the structural load that would otherwise pass through the studs removed to create the opening. Header size should match your plan’s specification for that specific opening width; wider openings need deeper headers to span the same load safely.
Can I frame a shed wall by myself?
Yes, for most standard shed wall sizes. Building the wall flat on the floor deck is entirely manageable solo — it’s the raising step where a second person becomes genuinely helpful, particularly for walls longer than about 8 feet. Shorter wall sections can be raised solo with careful technique, using the bottom plate as a pivot point and working the wall up gradually rather than lifting it all at once.
How do I know if my wall frame is square?
Measure both diagonal corners of the completed wall frame, corner to corner. If the two measurements are equal, the frame is square. This check should be done before standing the wall up (while it’s still flat on the floor deck) and again after raising and before permanent fastening, since the raising process can sometimes introduce small shifts.
What’s the difference between a king stud and a jack stud?
A king stud is a full-height stud running from the bottom plate to the top plate, positioned on either side of a door or window opening. A jack stud (also called a trimmer stud) sits immediately next to the king stud but runs only from the bottom plate up to the underside of the header, providing direct vertical support for the header above the opening.
Ready for the Next Step?
Once your walls are framed, raised, and squared, the next stage is roof framing — and every plan on this site includes complete roof framing plans matched to the wall dimensions you’ve just built.